How to transfer your Homematic IP Cloud installation to the Home Control Unit
A smart home should not only be intelligent but also flexibly adaptable. The Home Control Unit makes exactly that possible. Use the system transfer function in the free Homematic IP app to migrate your existing Homematic IP installation from the Access Point to the Home Control Unit.
Practical step-by-step guide
1. Preparation
Before you start transferring your system, make sure your Home Control Unit is ready for use:
- Open the Homematic IP app and set up the Home Control Unit completely.
- The Home Control Unit must be connected to your network and ready for operation.
Once these requirements are met, you can start the transfer.
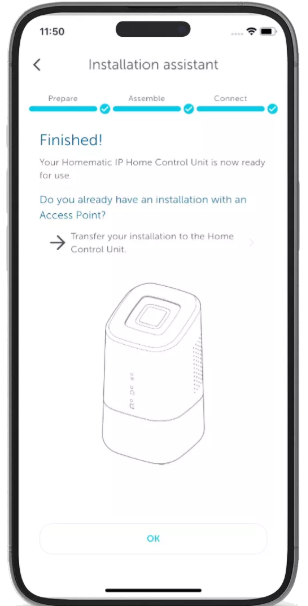
Note: If the Home Control Unit has already been reset once, its USB flash drive must be initialised via HCUweb before the system transfer. Otherwise the USB storage will not be available for transferring measured data during the move.
2. Start the system transfer
Now the actual transfer process begins. You start it in the device settings of the Home Control Unit. Please note the following points:
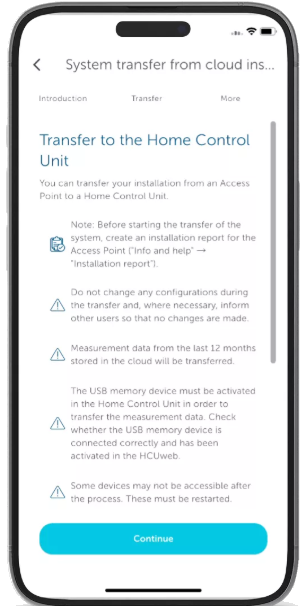
- Create an installation report: Save the current settings by creating an installation report.
- Check device availability: Some devices may not be directly accessible after the transfer. Restart them if necessary.
- Reconfigure users and other services: User accounts, smartwatches and other services must be reconfigured.
- Re-pair Hue devices: If you use Philips Hue, you will need to re-integrate it into the app using the plugin.
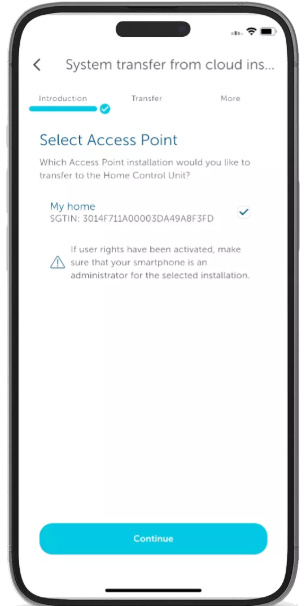
- Administrator rights required: The smartphone you use to start the transfer needs administrator rights. Have your administrator PIN ready.
3. Select and prepare devices
Now select the installation to be transferred to the Home Control Unit:
- Define the access point installation: If you have several installations, decide which one should be transferred to the Home Control Unit.
- Select the main access point: If you use an extended system with several access points, determine which one will be the main device.
- An administrator PIN is required to start the transfer.
After completing these steps, a connection is established between your access point and the Home Control Unit. The transfer data is verified.
4. Performing the data transfer
Now the actual data transfer begins:
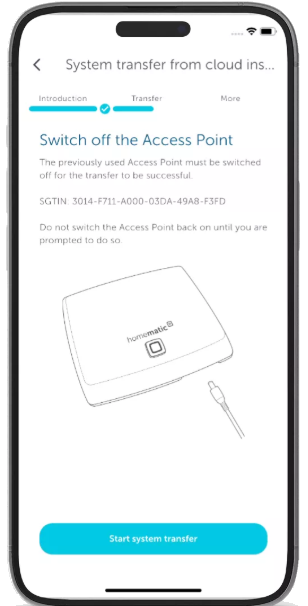
- Switch off the access point: Disconnect the access point from the power supply (pull the plug) so that the transfer can run smoothly.
- The transfer can take up to six minutes. During this time the Home Control Unit lights up orange.
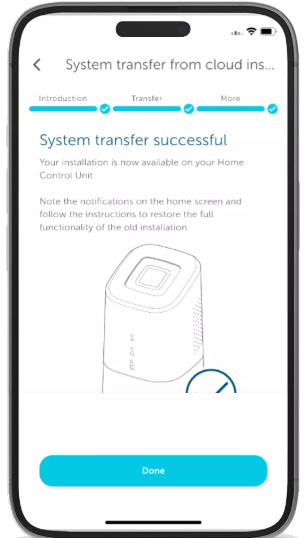
- As soon as the data has been transferred successfully, you will receive a confirmation in the app.
5. Post-processing and completion
After a successful transfer, you should check and adjust some settings:
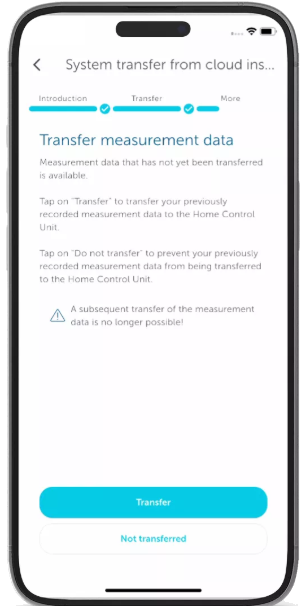
- Transfer measured data: You can transfer measurements from the last 12 months. Note: this option cannot be activated later!
- To avoid wireless conflicts, reset the old Access Point and delete the cloud installation.
- Reconfigure user accounts, access permissions and other services to get the most out of your system.
6. Done! The system has been transferred
Congratulations! Your Homematic IP system now runs exclusively via the Home Control Unit.
Thanks to this simple change, you can enjoy more comfort and flexibility in your smart home.
If you want to change something later, all settings are available in the Homematic IP app.
That's how easy a system transfer is
Do you want to switch from the access point to the Homematic IP Home Control Unit? In our video we show you step by step how to transfer your entire system safely and reliably – quickly, easily and without having to restart your smart home. Take a look!